Feeds:
Posts
Comments

It has been ages since I’ve posted. Life seems to get in the way of blogging. I’ve just signed a contract with a publisher for a third cookbook. I apologize to all of you backpacking enthusiasts because this latest one I’m working on is for an entirely different type of camping.

I thought I’d share a few of my backpacking food related articles and recipes from Seattle Backpackers Magazine in order to give you a few more options to enhance your backpacking menu.

April 2011: Eggs in the Backcountry

May 2011: The No-Cook Trail Lunch

June 2011: Chia—It’s not just a novelty gift

July 2011: Inspiration from the Produce Aisle

August 2011: Bread Getting Squashed in Your Pack? Here are some alternatives…

Sept 2011: It’s Apple Harvest Time

July 2012: Dispelling the Mushroom Myth

And here is one, including a few recipes, that I wrote for Gluten-Free Ontario.

January 2012: Gourmet Gluten-Free Wilderness Camping

Enjoy!

P.S. I’ll be signing books and leading a wilderness cooking workshop in Ontario’s beautiful Algonquin Provincial Park during the first full week of August 2012. For details please visit www.aforkinthetrail.com.

As you probably have guessed by now, I really like dip-able things for my trail lunches. This one is really great with a little bit of goat cheese if you are an ovo-lacto vegetarian.

kara’a

vegan and gluten-free

dehydration time: 5–8 hours
makes 4-6 servings

This slightly spicy, Libyan inspired, pumpkin dip is a nice alternative to hummus. I first made it for my son when he was studying Libya in his Grade 5 social studies class. The addition of pumpkin seed butter is not traditional but it adds nutrition. It is best served with a warm flatbread such as naan or pita.

1 teaspoon caraway seeds
1 teaspoon cumin seeds
3 garlic cloves, finely chopped
1 fresh red chilli, seeded and finely chopped
pinch of kosher salt
2 cups cooked canned pumpkin
2 tablespoons pumpkin seed butter
juice of 1 lemon
fresh ground black pepper, to taste
2 tablespoons olive oil

At Home
Toast the caraway and cumin seeds in a dry non-stick frying pan for a few minutes until they become fragrant. Using a mortar and pestle crush the seeds, then add the garlic, chili pepper, and a pinch of kosher salt. Grind into a paste. Pulse the pumpkin and pumpkin seed butter together in a food processor, add the lemon juice, fresh ground black pepper to taste, and the spice paste.

Spread evenly on lined dehydrator trays, keeping the mixture about 1/4 inch thick. Dry for 5 to 8 hours or until the mixture is thoroughly dry. Grind into a powder in a spice grinder or blender. Store in a medium ziplock freezer bag. Add the olive oil to the other olive oil you are taking on your trip.

At Camp
Rehydrate the pumpkin mixture using a formula of 1 1/2 parts dried mix to 1 part water. Wait 5 to 10 minutes then add a little more water if it’s too dry. Stir in 2 tablespoons of olive oil.

Tip
You may use fresh pumpkin or other squash that has been roasted or stewed for this but canned pumpkin is easier.

This chili recipe came about because my darling husband was craving quinoa. It didn’t matter that we’d had quinoa soup for two days before, he still wanted something else with quinoa. His love of my vegan quinoa dishes always surprises me. I grumbled lovingly, and headed to the kitchen to see what I could create without having to run to the market. This is the recipe that came out of my kitchen experiment. Use a whole jalapeño pepper if you like a little more heat.

quinoa and bean chili with tomatillos

vegan and gluten-free

dehydration time: 7–10 hours
makes 6 large servings

1 tablespoon olive or avocado oil
1 medium onion, chopped
1 stalk celery, chopped
1/2 small jalapeño pepper, minced
½ cup red quinoa, rinsed and drained
2 cloves garlic, minced
2 tablespoons chili powder
1 tablespoon ground ancho chili pepper*
1 teaspoon ground cumin
1 10-ounce can condensed tomato soup
½ cup vegetable stock or water
¾ cup canned tomatillos, diced
1 28-ounce can diced tomatoes
1 28-ounce can red kidney beans, drained and rinsed
1 19-ounce can black beans, drained and rinsed
1 19-ounce can chickpeas, drained and rinsed
2 tablespoons fresh lime juice
¼ cup fresh cilantro, coarsely chopped
Salt and pepper to taste

At Home
Add the oil to a large pot over medium heat. Sauté the onion and celery in the oil until softened. Put the quinoa in the pan and toast the seeds until they start to bounce in the pan. Add the jalapeño pepper, garlic, chili powder, ancho chili pepper, and cumin. Cook for 1 minute, then add the tomato soup and vegetable stock. Simmer for 10 minutes then add the tomatoes, tomatillos, beans, and lime juice. Simmer for 1 hour, add the cilantro, and season to taste.

Remove the chili from the heat and let it cool. Measure the chili and write this measurement on a sticky note. Place on lined dehydrator trays and dry for 7 to 10 hours. Place the dried chili in a ziplock freezer bag along with the sticky note.

At Camp
Add enough boiling water to the chili mix in a pot to equal the measurement on your sticky note. Do not add the water first or you will have too much liquid. Once rehydrated you might have to reheat the chili.

Note
I used a piece of a whole dried ancho chili pepper and ground it to a powder with a coffee grinder that I use exclusively for spices.

My second book, Another Fork in the Trail, was finally released just over a month ago and I’ve been busy chasing after my toddler, cycling with my 10-year old, and redoing www.aforkinthetrail.com as well as a slew of other things. I’m also gearing up to lead another wilderness cooking workshop in Algonquin Provincial Park for their Experience Algonquin series. I’ll be in the park for three events between August 3rd and 7th, 2011 including a book signing in the Visitors Centre on the 3rd. If you are in the area the day of the signing, please stop by and say hello.

Here is a recipe from the new book that you make at home before your trip. It makes for a refreshing trail snack with a great hit of lime. It almost reminds me of my of Key Lime Pie.

tropical kiwi trail cookies

vegan and gluten-free

dehydration time: 5–8 hours
makes about 18–20 cookies

Kiwi is a favorite around here. I first made these because we were going day hiking with a friend who is a raw foodie and I volunteered to make the snacks. I’m still torn as to whether these should be considered a snack or dessert.

1 cup dates such as Medjool or honey dates
1/2 cup almonds
1/2 cup cashews
2 kiwi fruit, peeled and quartered
3 tablespoons fresh lime juice
1/4 teaspoon lime zest
1/2 cup shredded coconut

At Home
Pulse the dates in a food processor until ground to a thick paste. Toast the almonds, if desired, in a dry non-stick frying pan over medium heat just until they start to become fragrant. Be careful that you do not burn them. Add the almonds and cashews to the dates and pulse to chop the nuts. Add the kiwi fruit, lime juice, and lime zest, then pulse again until well combined. Remove the container from the food processor and take out the blade. Toast the coconut, if desired, in a dry frying pan until golden and then stir into the date and kiwi mixture.

Line your food dehydrator with fruit leather trays, plastic wrap, or parchment paper. Drop the fruit cookie mixture by heaping tablespoons and press flat until about 1/4 inch thick. If your unit has a temperature control, set it for 104°F and dry for 5 to 8 hours or until the cookies are dry and firmed up. Wrap the cookies in waxed paper and store in ziplock bags. Theses cookies will keep in the freezer for up to 3 months.

From Another Fork in the Trail by Laurie Ann March ©2010/2011

vegetarian and vegan recipes

vegetarian and vegan recipes

I have finally completed the second instalment in my wilderness cookbook series. Well, let me rephrase that. I’m almost done—I just need to do one more read through of the final layouts before it hit the presses this week. I’m doing that today because it’s just easier to sneak away to a quiet spot for reading while Bryan is home for the weekend.

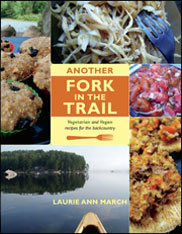
The book is entitled Another Fork in the Trail: Vegetarian and Vegan Recipes for the Backcountry and will be on shelves this Spring. If you like, you can pre-order at a variety of on-line retailers including Amazon.ca, Chapters.Indigo.ca, Amazon.com, and  BarnesandNoble.com.

I thought that I would take a short break and post one of my favorite lunch recipes from the book. This recipe isn’t just for the backcountry; we enjoy having this for a weekend lunch at home. If you want to have it at home just skip the dehydration instructions.

mediterranean garbanzo bean salad

dehydration time: 8–12 hours
makes 2 servings

I like to think of this salad as a little trip around the Mediterranean because it combines ingredients common in Spain, Italy, Greece, Israel, and Egypt. Za’atar is a flavorful spice blend available through Middle Eastern specialty stores and online spice retailers. This salad can be served cold but is especially delicious when served warm. You can even serve it over cooked quinoa or couscous for a nice dinner.

1 1/2 tablespoons olive oil or vegetable oil
1/3 cup shallots, finely chopped
1/4 teaspoon crushed red chilies (optional)
1 teaspoon orange zest
2 tablespoons fresh orange juice
Segments of 1 large orange
1 teaspoon lemon juice
2 cups canned chickpeas (garbanzo beans), drained and rinsed
1/2 cup green olives, pitted and chopped
1/2 teaspoon za’atar spice blend
1 teaspoon black pepper, freshly ground
1/8 teaspoon kosher salt

At Home
Heat the oil in a frying pan over medium to medium-high heat. Add the shallots and sauté for a few minutes. Add the crushed red chilies, orange zest, orange juice, and orange segments. Cook for a few more minutes and then add the lemon juice, chickpeas, olives, and za’atar spice blend. Simmer for a few minutes and then remove from the heat. Stir in the pepper and salt.

Allow the mixture to cool and then measure the amount you will dry. Write this measurement on a sticky note. Spread the salad on lined dehydrator trays to dry. When the salad is dry, package it in a ziplock freezer bag along with your note.

At Camp
Rehydrate the salad by adding enough boiling water to the mix to make it equal to the measurement on your sticky note. Be sure to account for and add your dried ingredients to the rehydration container prior to adding the water. You can always add more water if you need to. Once the salad has rehydrated, reheat it if desired.

Tips
If you can’t find za’atar, then use a combination of thyme and basil, as they will pair nicely with this salad as well.

If you’d like to have this recipe for lunch, you can add cold water to the mixture at breakfast and let it rehydrate in your pack as you travel.

This is also good for dinner served on couscous or quinoa that has been cooked with a little vegetable stock or orange juice or with pitas that have been toasted, drizzled with a little olive oil, and sprinkled with a bit of the za’atar spice.

From Another Fork in the Trail by Laurie Ann March ©2010/2011

a long time coming

My return to posting on this blog has been a long time coming. I’ve been busy with the challenges of a new baby, finishing the manuscript for my second wilderness cookbook, outdooradventurecanada.com, and life in general. Another Fork in the Trail, is now in the publisher’s hands and I will see the layouts this week. The book should be on shelves by mid-May.

Amidst all of this I have been writing a monthly recipe column for Seattle Backpackers Magazine.

Here are the links to each month’s instalments…

December 2010: Quinoa – A Superfood for the Trail

January 2011: Winter Drinks to Warm You Up

February 2011: Romancing the Trail

March 2011: Soup’s On – Pizza Soup and Ribollita

I hope you enjoy the recipes and articles. I’ll be posting more recipes on the backpacking recipes blog soon.

I love salads on the trail as many of my readers know. Since writing this recipe for A Fork in the Trail, I have rehydrated it using cold water. It takes about 1/2 hour to rehydrate the couscous this way and eliminates the need to pull out the stove at lunchtime. That said, this salad tastes nice warm too.

curried tuna and couscous salad

dehydration time: 5 to 10 hours
makes 2 servings

Quick cooking and versatile, couscous makes a good base for a salad. This flavorful dressing works well with tuna, but to make it vegetarian use some of your favorite vegetables instead of the fish.

Salad
1/3 cup roasted cherry or grape tomatoes
1/2 teaspoon salt
1/8 cup red onion, minced
1/2 cup instant whole wheat couscous
1 3 oz pouch tuna
1/4 cup sliced almonds

Dressing
1/4 teaspoon curry powder
1/2 teaspoon honey
1 tablespoon red wine vinegar
¼–1/2 teaspoon Dijon mustard to taste
2 tablespoons olive oil

At Home
Preheat the oven to 350ºF. Cut the tomatoes into halves or quarters and sprinkle with a little salt. Put them on an oiled baking sheet. Roast them for 30 to 40 minutes. Remove the tomatoes from the oven and allow them to cool. Dry the minced onions and cooked tomatoes on separate lined dehydrator trays for 5 to 10 hours or until dried thoroughly. Package in a ziplock freezer bag.

Place the couscous in a large ziplock freezer bag with a copy of the cooking instructions from the package. Add the pouch of tuna and the bag with the tomato mixture to the bag of couscous. Wrap the curry powder and almonds separately in plastic wrap. Pour the mustard, honey, and red wine vinegar in a leakproof container and place it in the bag of couscous along with the spice and almonds. Add the olive oil to the other oil that you will take on your trip.

At Camp
Add enough boiling water to the tomato and onion to barely cover them. Allow to sit for 15 to 20 minutes or until rehydrated. Prepare the couscous according to the directions you packed. Allow the couscous to cool. Make the dressing by mixing the mustard, honey, and red wine vinegar with 2 tablespoons olive oil and the curry powder. When the couscous is done, mix in the tomatoes and onions and add the dressing. Sprinkle with sliced almonds and stir gently to coat.

From A Fork in the Trail by Laurie Ann March ©2008

egg replacers

I often get asked about egg replacement for trail recipes.

These two recipes and information are from A Fork in the Trail’s chapter on Recipe Creation. This bit appears on pages 26 and 27.

“You can purchase egg powder that is suitable for baking but not for use as scrambled eggs. If you have an allergy to eggs or you are vegan, you can purchase egg-free egg replacer at your local health food store.

If you prefer, you can make your own egg replacer. It is similar to egg whites and works well in white cakes, muffins, and cookies. The addition of oil mimics a whole egg in baking. To make the equivalent of one egg, mix 1 1/2 teaspoons tapioca starch, 1 1/2 teaspoons potato starch (sometimes found with the Kosher foods), and 1/8 teaspoon baking powder together and store it in a ziplock freezer bag. Then when you’re ready to use it at camp, add 1/4 cup of water and 1 teaspoon of vegetable oil. Beat the mixture with a fork until it becomes a little foamy.

Ground flax seed can be used in muffins, breads, or other baked goods, but it imparts a flavor that might be unpleasant in a cake or cookies. Keep the ground flax seed cool and away from air and light to prevent it from becoming rancid; this recipe is not suitable for use in hot weather or more than two days into a trip. Store the seeds in the refrigerator until you leave for your trip. To make the equivalent of one egg, use 2 tablespoons ground flax seed. If you cannot find ground flax seed, then grind whole flax seed. Pack the powder in a ziplock freezer bag, removing as much air as possible and storing it away from sources of heat and light. When you’re ready to use it, add 3 tablespoons of water to the ground flax seed and let it sit for 3 to 5 minutes. Add to your recipe like you would regular eggs.”

yet another update

I have to apologize for not keeping up with my blog, however, after a very interesting Fall and a Winter that didn’t seem like Winter at all, I have returned to blogging. I spent most of my time off working on the manuscript for Another Fork in the Trail. Our family had a very big surprise in October as well. We found out that we are expecting and that means I’ll be off the trail and the waterways for 2010 as the little one is due to arrive in June. It also means that the release of Another Fork in the Trail has been put off until early 2011.

This spring and summer I will post more recipes and food finds as time permits… so stay tuned.

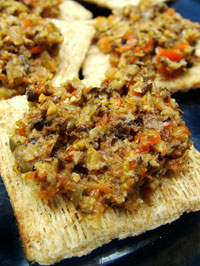
I don’t like to have to pull the stove out at lunch, unless the weather is very cold, so I generally try to create no-cook lunches for our trips. This one is a family favorite and will be appearing in my upcoming book, Another Fork in the Trail. The book, the second in my backpacking cookbook series, is expected to be released in Spring 2010.

olive tapenade

dehydration time: 8 to 10 hours
makes 4 to 6 servings

I first had this tapenade at a Fall gathering being hosted in Ontario, Canada’s Algonquin Provincial Park. The original recipe belonged to my friend Alison and it was her contribution to an impromptu potluck. I have modified the dish to suit backcountry trips and although it is great as a spread, it can double as a refreshing addition to pasta.

olive tapenade

olive tapenade

1 cup pimento stuffed green olives, drained
1 cup pitted black olives, drained
1 cup marinated artichoke hearts, drained
1 hot banana pepper, coarsely chopped
1/2 sweet red pepper, coarsely chopped
1 clove garlic, minced
1/4 teaspoon dried basil
1 tablespoon capers, minced
1 tablespoon lemon or lime juice
1 tablespoon extra virgin olive oil

At Home
Put the olives and artichokes in a food processor and pulse to chop the mixture. It should be a fine chop, but not to the point of being a puree. Put the olive mixture in a bowl and set aside. Next, put the peppers in the food processor and pulse until the peppers are the same consistency as the olive mixture. Add the peppers to the olive mixture along with the garlic, basil, capers and lemon juice. Stir until well combined.

Spread onto lined dehydrator trays and dry for 8 to 10 hours. Package the tapenade in a medium ziplock freezer bag and add the olive oil to the other olive oil you are taking on your trip.

At Camp
Rehydrate the tapenade using a formula of 1 1/2 parts dried mix to 1 part water. Let rehydrate for 10 minutes and add a little more water if necessary. Stir in 1 tablespoon of olive oil, if desired, and serve with your favorite cracker or flatbread.

created by Laurie Ann March ©2008